

You have a Windows laptop
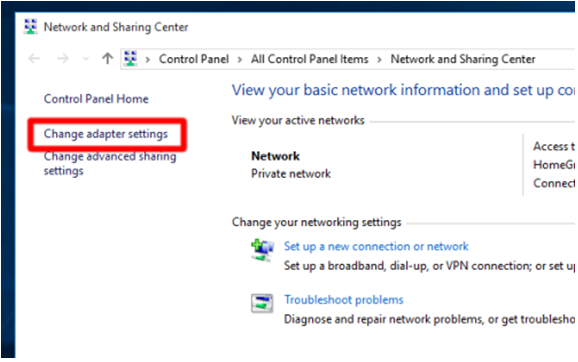
A. Right click on the network icon at the bottom right of your screen, and select Open Network and Sharing Center.

B. Click on Change adapter settings.
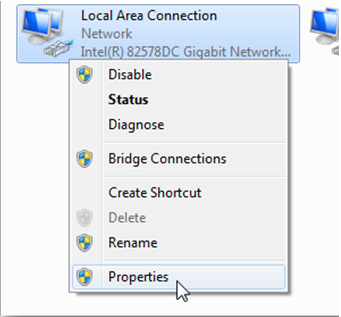
C. Right click on Local Area Connection (also called Ethernet Connection) and select Properties.
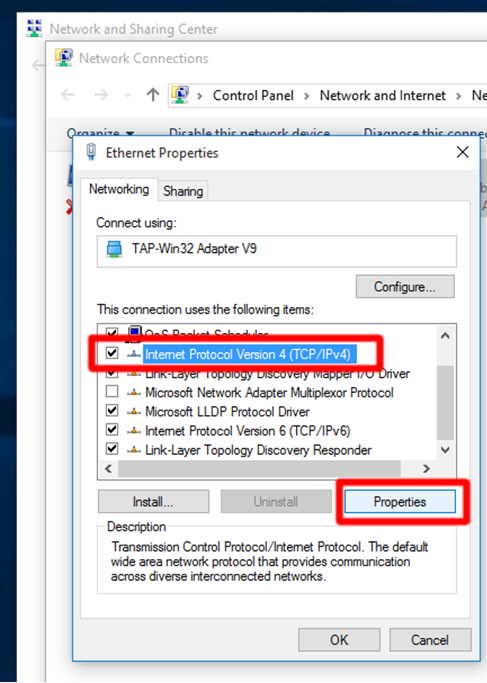
D. Select Internet Protocol Version 4 (TCP/IPv4) and click Properties.
E. Select Use the following IP address, and enter the same network settings as the meter, except for the last portion of the IP address which must be unique and not used by any meter on the network.
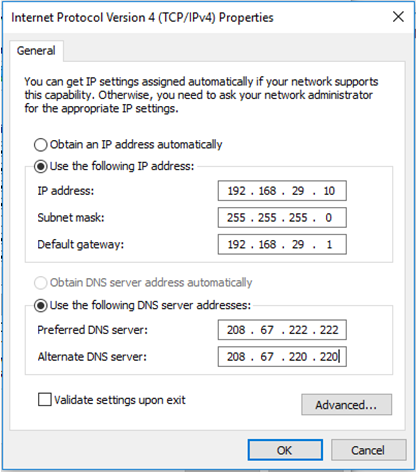
F. Click OK twice, and reboot your laptop for the new IP settings to be applied to your network
card.
You have a MAC laptop
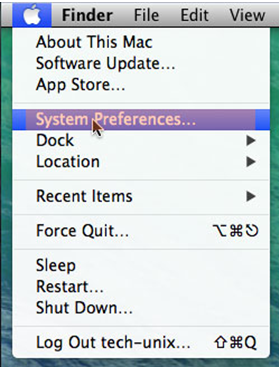
A. On the upper left corner click the Apple icon then select System Preferences.
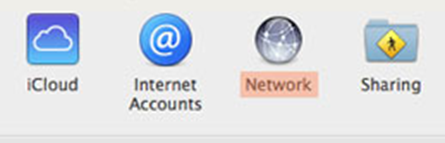
B. Under System Preferences select Network.
C. Select the Ethernet interface where you want to assign the static IP Address. Click the lock to make changes, it will prompt you for your credentials – your username and password – to make changes on the network settings.
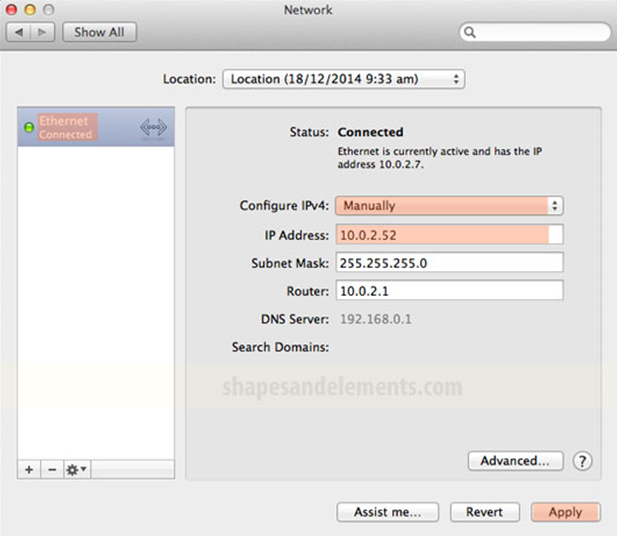
D. Under Configure set the option to Manually and enter the same network settings as the meter, except for the last portion of the IP address which must be unique and not used by any meter on the network.
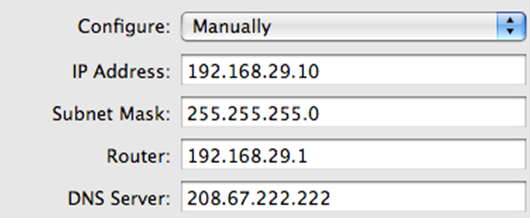
E. Click Apply, and reboot your laptop for the new IP settings to be applied to your network card.
+353 (0)1415 1242 | info@ai-elements.com | Contact
us
Anthony Schoofs
Chief Technical Officer at AiElements
Anthony drives AiElements' innovation on energy efficiency for industrial and grid environments. Anthony is also behind WSNbuzz.com, a blog covering technology advances within the smart grid and IoT markets, and was listed in 2011 amongst the top 100 IoT thinkers. Anthony was recently awarded the Globe Sustainability Research Award for his contribution to advancing knowledge on sustainability.
Latest posts by Anthony Schoofs (see all)
-
Export your AiElements data to Tableau business intelligence software - December 8, 2017
-
Connect your Schneider PowerLogic PM8000 meter to AiElements with the Obvius AcquiSuite EMB A8810 Data Acquisition Server - December 7, 2017
-
Connect your EIG Nexus 1500 meter to AiElements with the Obvius AcquiSuite EMB A8810 Data Acquisition Server - December 7, 2017