

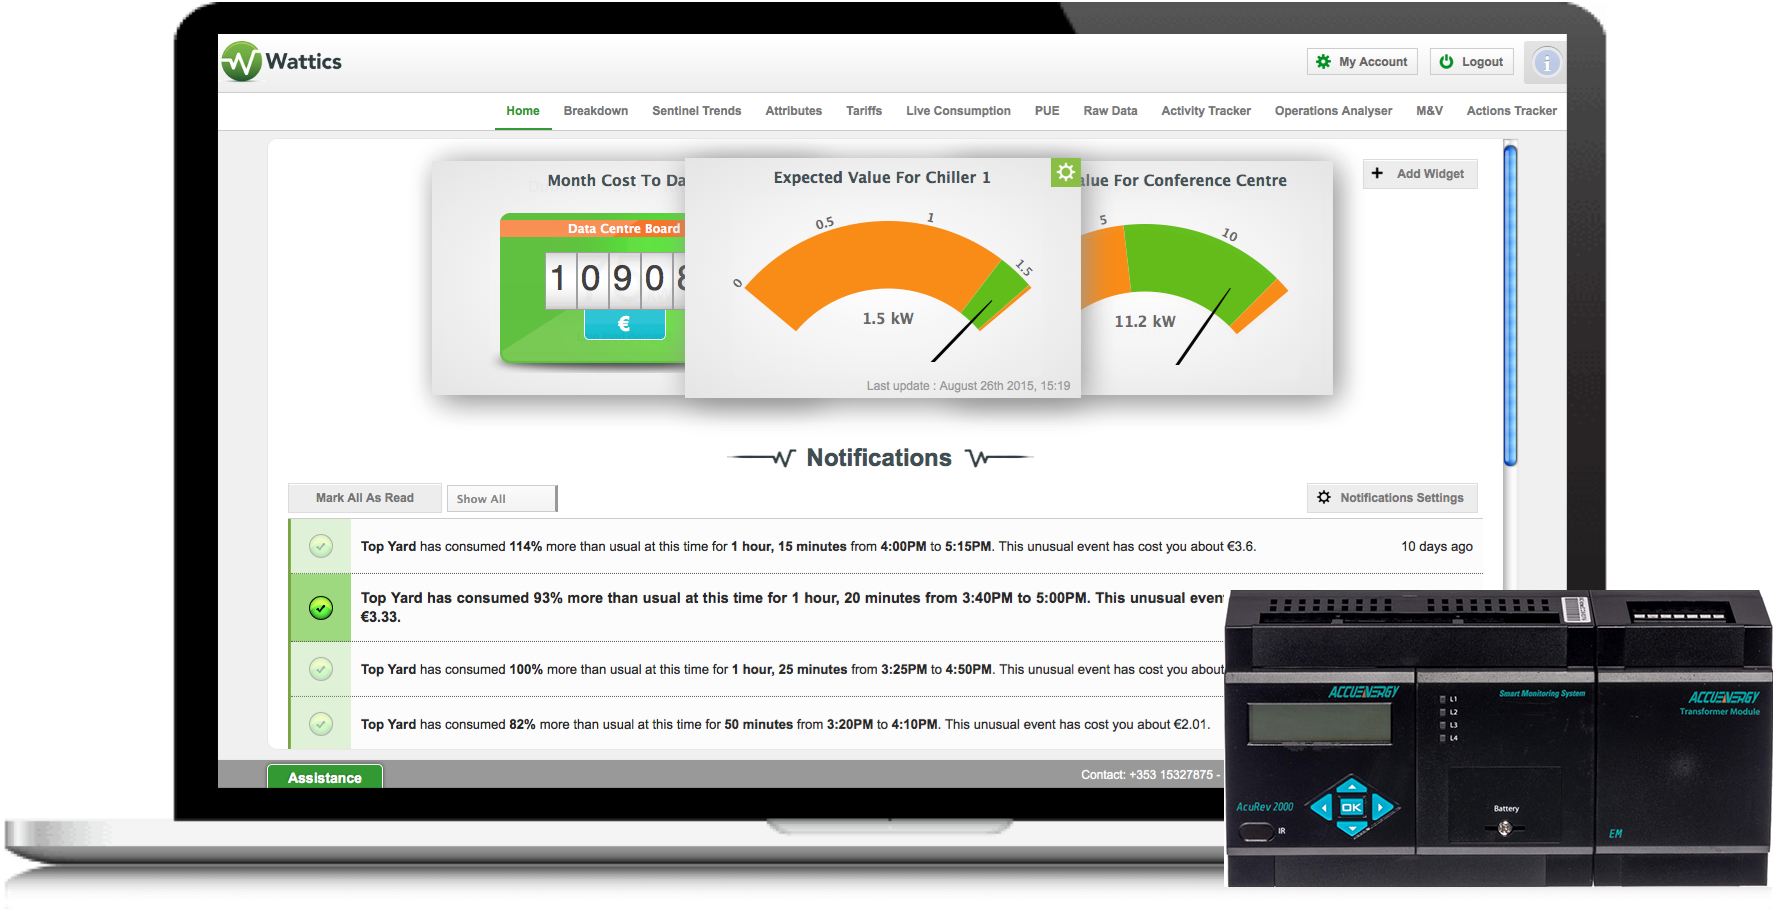
This post illustrates how to enable the automated transmission of meter readings from your Accuenergy AcuREV20XX meters to the AiElements Energy Analytics Dashboard in nine easy steps.
Accuenergy AcuREV20XX meters allow for automated data transmission via HTTP Post, meaning that once the meter is given internet access it can be configured to send data to AiElements without the need of additional hardware requirements such as a gateway device. The set up to configure the meter to automatically push data to AiElements is extremely easy and can be carried out in a few minutes following this step-by-step guide.
STEP 1: Request a Meter ID from AiElements
Each meter you wish to connect to AiElements requires a Meter ID as unique identifier. Unless your meter has been pre-configured already with a unique Meter ID, you must request a new Meter ID from AiElements via the AiElements Meter ID Request Form. One of our agents will be in touch shortly with your new Meter ID needed to configure your meter.
STEP 2: Install your meter
If not done yet, install your meter using the AcuREV20XX user manual.
STEP 3: Provide network access to your meter
Connect your AcuREV20XX meter to your Ethernet LAN with a cat5 cable.
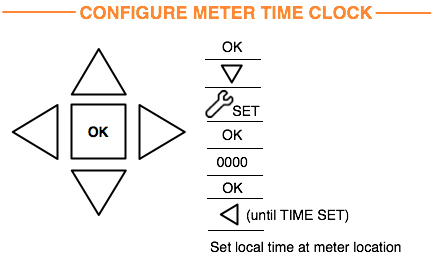
STEP 4: Configure the meter time clock
Set the meter time clock to your local time via the meter display menu:
-
Select SETTINGS at the main screen and press OK.
-
Enter the meter password (default is 0000) and press OK.
-
Press the left cursor until you reach the TIME SET tab.
-
Set the local time and press OK.
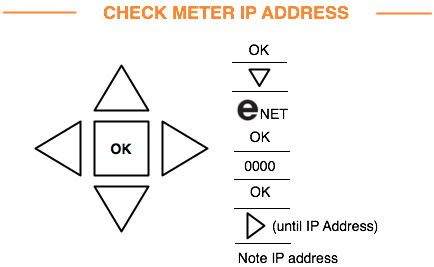
STEP 5: Retrieve your meter IP address
The meter IP address can be retrieved via the meter display menu:
-
Select NET at the main screen and press OK.
-
Enter the meter password (default is 0000) and press OK.
-
Press the right cursor until you reach the IP ADDRESS tab.
-
Write the IP address of your meter down (e.g. 192.168.1.254).
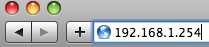
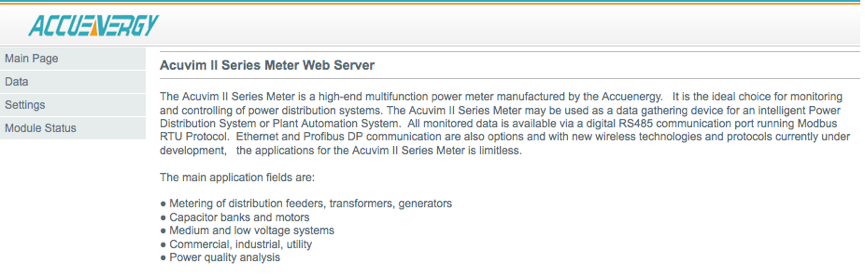
STEP 6: Open the meter’s web server page
Access a PC or laptop connected to the same LAN as the meter, open an Internet browser window, type in the meter IP address in the URL bar and hit the Enter key. The meter’s web server page will be displayed.
Alternatively you can unplug your meter from the LAN and connect it to your laptop with a cat5 cable for configuration. The meter will need to be reconnected to the LAN after configuration.
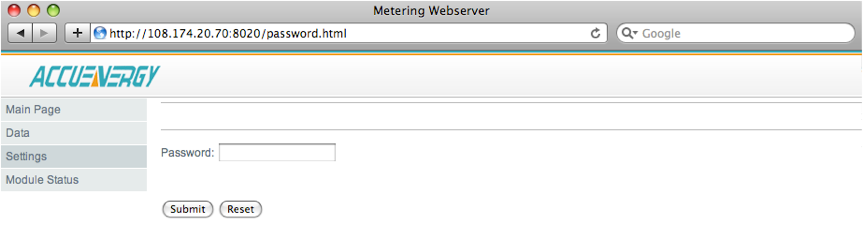
Click on the ‘Settings’ menu tab and submit the password (default password is ‘12345678’).
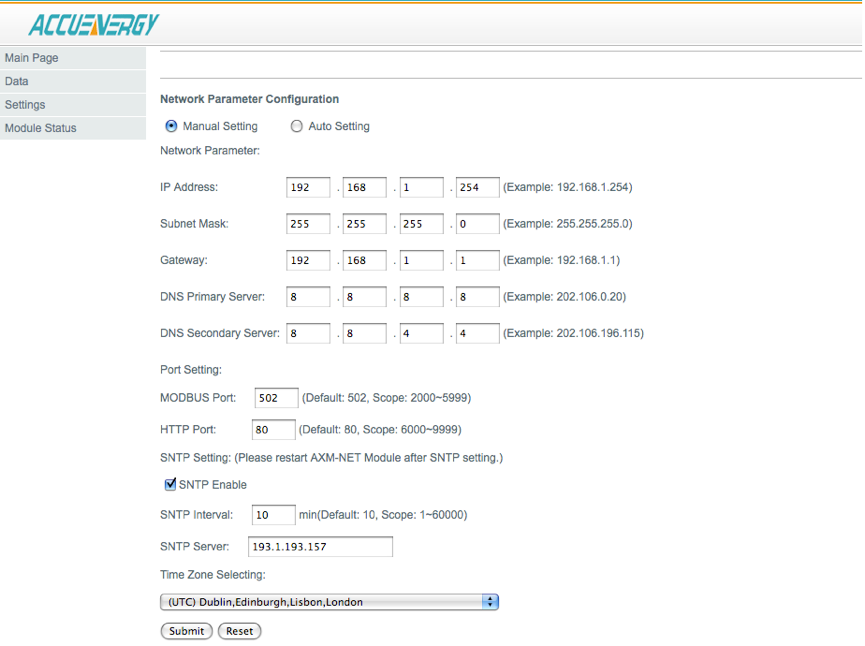
STEP 7: Configure the network parameters
After the password has been entered, a ‘Network Parameter Configuration’ page is displayed.
-
Select Manual or Auto Setting to enable Internet access on your meter. You will need to get network parameters from your IT department if IP Address, Subnet Mask and Gateway IP address must be registered with your IT department for Internet access. You can select Auto Setting if DHCP is enabled and no firewalls are in place (most typical setup).
-
Enter 8.8.8.8 and 8.8.4.4 for the primary and secondary DNS servers.
-
Enter ‘502’ for the MODBUS Port.
-
Enter ‘80’ for the HTTP Port.
-
Enable SNTP, and click on the link below to find the correct SNTP server for your country. On the link you will need to select your area and copy your country’s server URL. That URL must be copied in the SNTP Server field.
https://support.ntp.org/bin/view/Servers/NTPPoolServers
For example, for Italy, you will click on Europe, copy it.pool.ntp.org, and paste it in the SNTP Server field.
-
Select the correct timezone for the geographical location where the meter is installed.
-
Submit.
STEP 8: Configure the Http Push functionality
Hover over the ‘Settings’ tab and select the ‘Http Push’ option from the list.
Configure your meter to automatically send data to AiElements cloud platform as follows:
-
On the Http Push webpage, tick the ‘HTTP POST Enable’ button.
-
Enter the Post URL received from AiElements by email
-
Enter the Meter ID received from AiElements by email
-
Set ‘HTTP Port’ to 80.
-
Leave ‘Post Channel 2’ sub-menu empty.
-
Set ‘Post Interval’ to 5 minutes.
-
Tick all five ‘Post Content’ buttons.

Click on ‘Submit’ to complete the configuration. Reboot your meter (power down and up again), your meter is now configured to upload new data readings to the AiElements platform every five minutes.
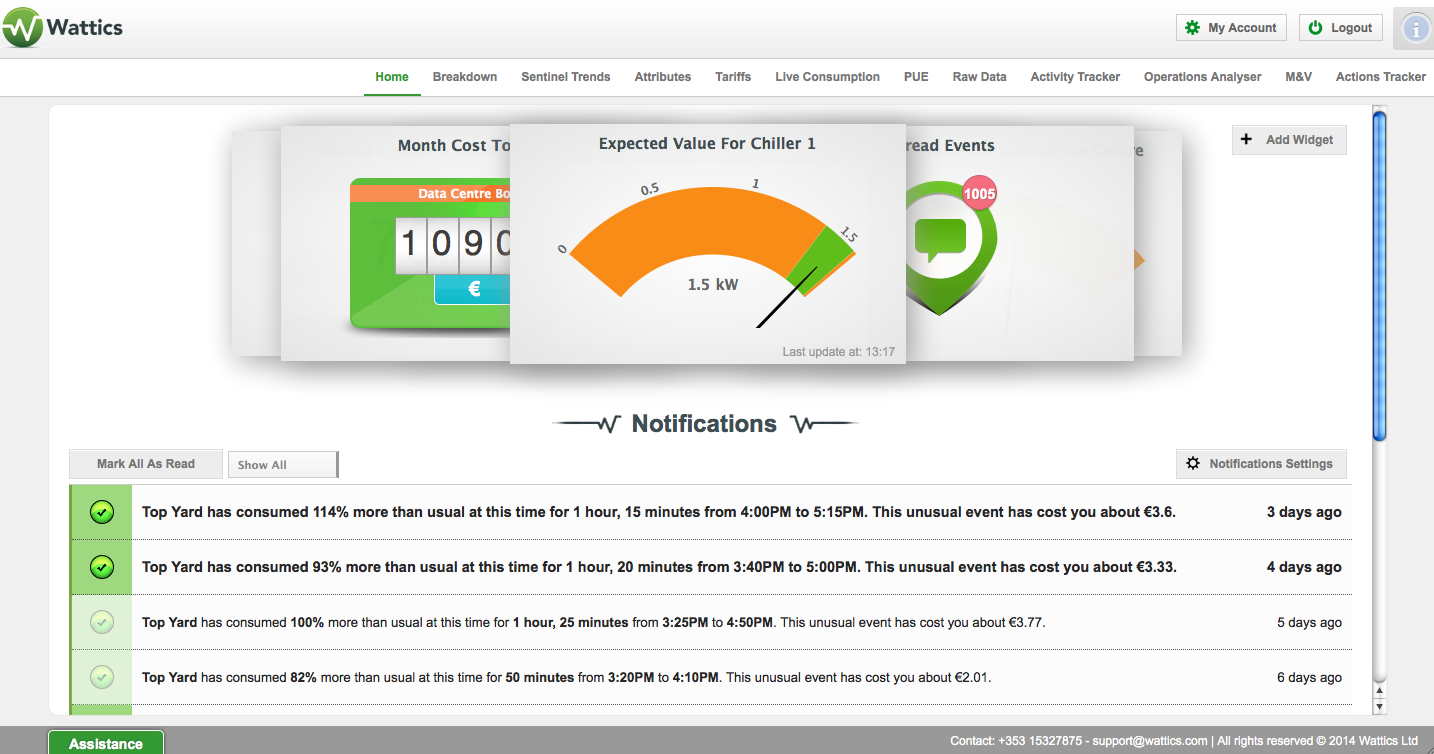
STEP 9: Get started with AiElements!
You will receive an email from AiElements as soon as the first meter readings are received.
This email will provide you a link to create a username and password to access your AiElements dashboard. From then on you will be able to log in to your AiElements Dashboard at http://dash.ai-elements.com and get started! You will be able to edit the name of your (new) organisation, site and meters from the Attributes tab, so that you can add multiple meters and manage them all together in one place.
Please contact us at support@ai-elements.com if you have any difficulty with configuring your system.
Anthony Schoofs
Chief Technical Officer at AiElements
Anthony drives AiElements' innovation on energy efficiency for industrial and grid environments. Anthony is also behind WSNbuzz.com, a blog covering technology advances within the smart grid and IoT markets, and was listed in 2011 amongst the top 100 IoT thinkers. Anthony was recently awarded the Globe Sustainability Research Award for his contribution to advancing knowledge on sustainability.
Latest posts by Anthony Schoofs (see all)
-
Export your AiElements data to Tableau business intelligence software - December 8, 2017
-
Connect your Schneider PowerLogic PM8000 meter to AiElements with the Obvius AcquiSuite EMB A8810 Data Acquisition Server - December 7, 2017
-
Connect your EIG Nexus 1500 meter to AiElements with the Obvius AcquiSuite EMB A8810 Data Acquisition Server - December 7, 2017