


Are you ready for energy savings? Enable our cloud-based energy analytics and dashboard for your
Northern Design Rail 350
meters, to discover, measure and verify savings in the premises you manage.
The Northern Design Rail 350 is a multi-function meter measuring kWh, kVARh, kW, V, A, PF & Hz. You can now connect your Rail 350 meters to AiElements via our Octopus gateway in a few steps.
It is assumed that your Rail 350 is already wired and collecting measurements. If not, read and understand Northern Design manuals for installing, operating, or maintaining your Rail 350 meter. Installation and program procedures must be carried out and inspected by qualified personnel. Qualified personnel are those who, based on their training and experience, are capable of identifying risks and avoiding potential hazards when working with this product.
1 RS485 connection
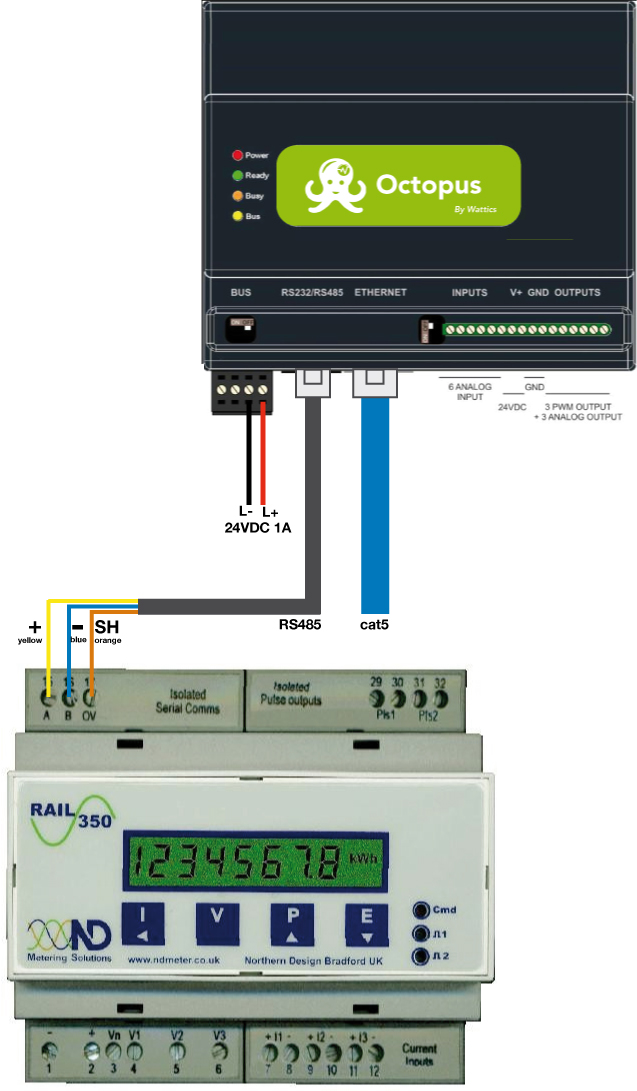
Make sure that all devices are powered off before any wiring is done.
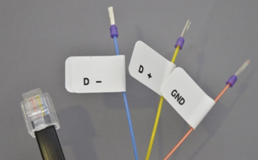
If you have received a RS485 cable with your Octopus, you must connect it to the meter (or first meter of the daisy chain) as follows:
Yellow wire = input 15
Blue wire = input 16
Red wire = input 17
If you are building your own RS485 cable, please follow the colour code and sequence below.
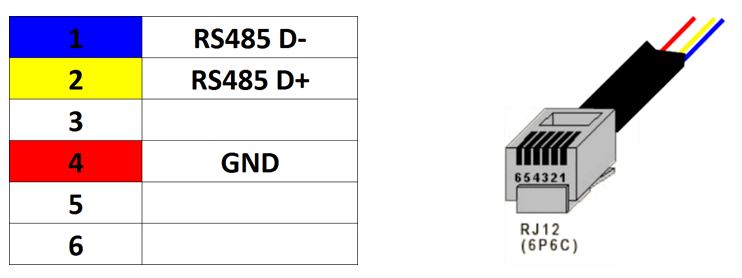
Cut/isolate the other wires before powering up the Octopus to avoid unexpected shorts. You can then click the RS485 cable to the Octopus RJ12 connector.
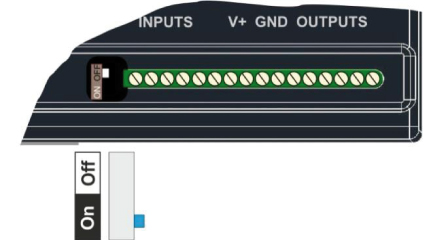
Switch on the resistor if you have a daisy chain installations.
2 Meter Modbus setting
You must check and write down your meters’ Modbus address and baud rate via their display. You
will need this information when configuring the Octopus.
3 Octopus Software Configuration
3.1 Download the Octopus Software Tool (Windows)
Request the Octopus Software Tool Download Link
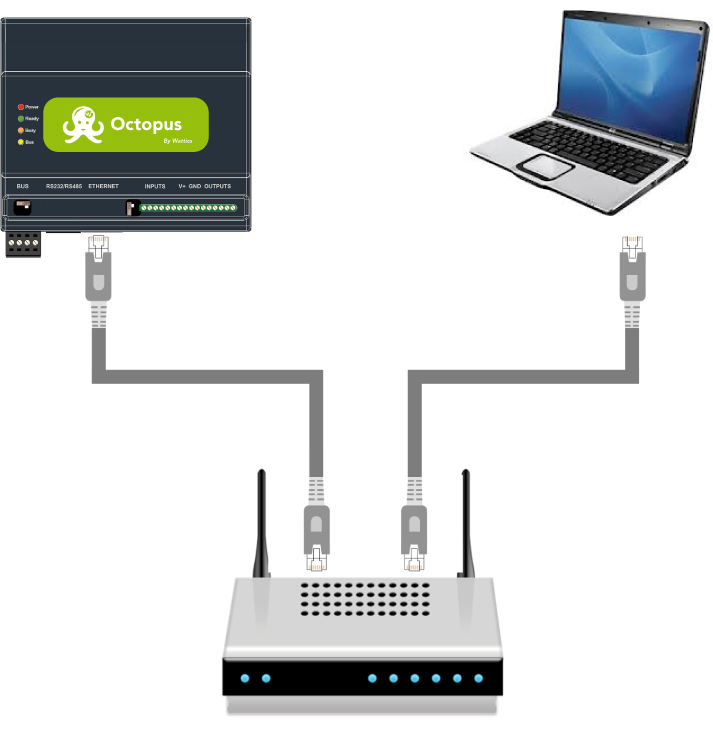
3.2 Connect your Octopus to your computer
Connect your computer running the Octopus Software Tool to the same network as the Octopus.
3.3 Configure your deployment setup
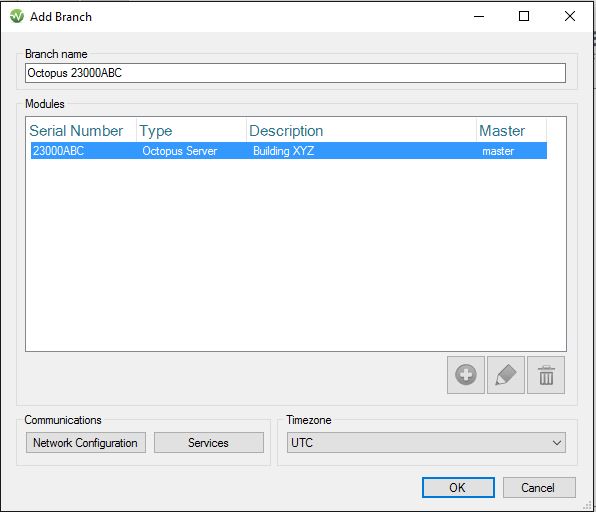
Launch the AiElementsTool.exe Software Tool and create a new Branch, using the “+” button. Fill
the “Branch Name” field with a short name for your project, and insert the serial number of your
Octopus Gateway that you can find on its sticker or on its box.
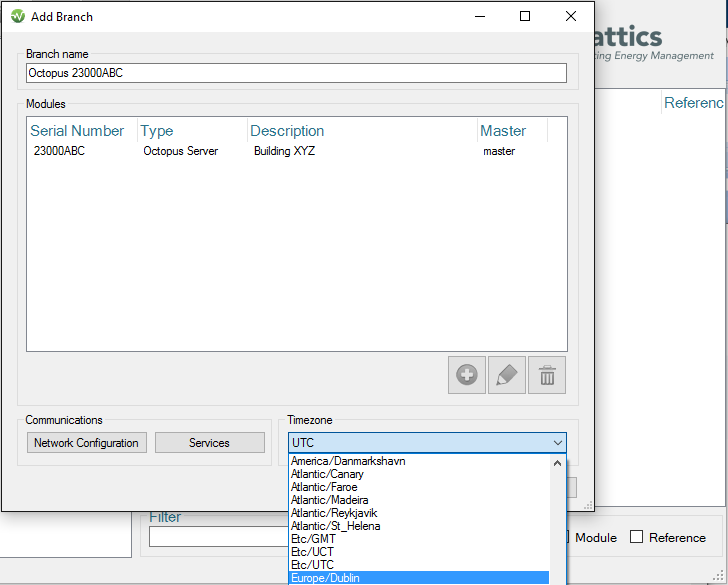
Select the correct timezone in the Timezone dropdown menu. If you cannot find your city select the closest city to your site location which is in the same timezone.
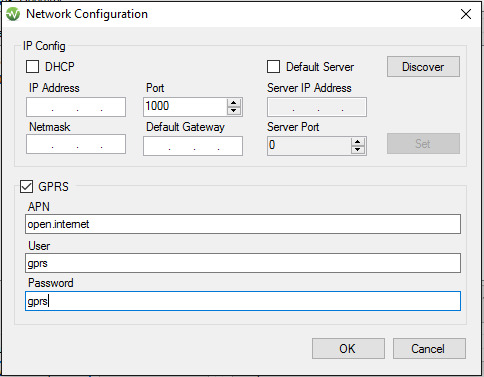
Click on Network Configuration to enable Internet access for your Octopus. You can enable DHCP to get the Octopus to connect to the Internet automatically (Tick DHCP, click on Discover, and click on Set when the Octopus IP address is shown). For LAN access with manually assigned static IP addresses, you will need to get network parameters from your IT department and enter them here.
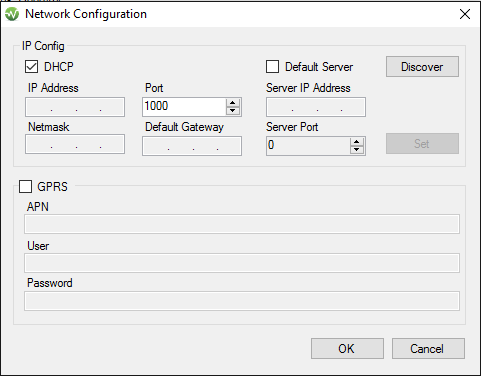
If you use a GPRS sim card for Internet access, you must enter your APN name and APN credentials here.
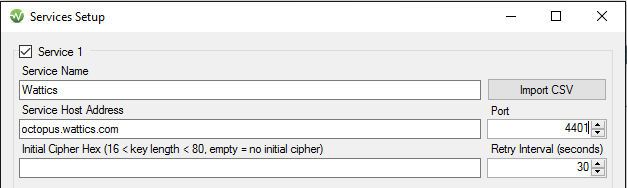
You must now set up the AiElements URL where data collected will be sent to. Click on Services button, and set the following:
-
Enable Service 1
-
Set AiElements as Service Name
-
Enter octopus.ai-elements.com as Service Host Address (
IMPORTANT:When using GPRS Sim cards or when your firewall does not support the use of URLs, you must enter 52.50.202.103 as Service Host Address.) -
Set 4401 as Port
-
Click OK.
You must click OK to create the Branch.
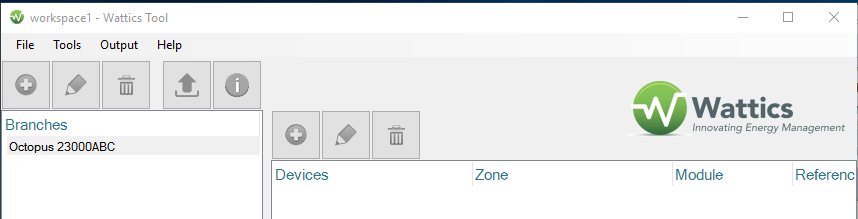
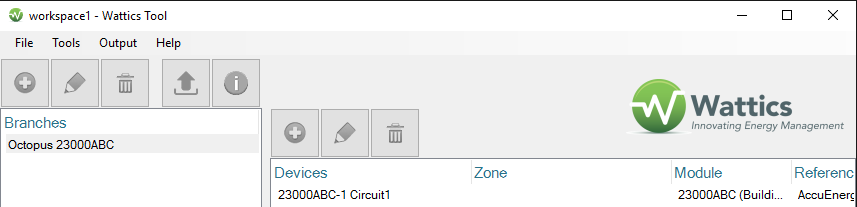
Once back to the Octopus Software Tool landing page, you can select your Branch and click the “Add” button on the right side to register the Northern Design Rail 350 meters connected to the Octopus.
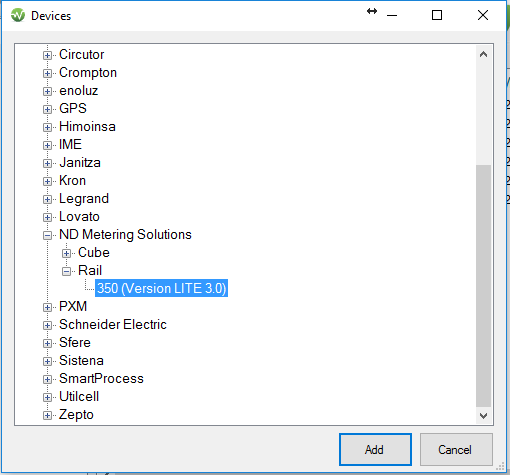
Find your meter in the drop-down menu and click Add.
At the next screen, you must enter the meter name, its Modbus address, baud rate, and whether it is connected to the Octopus Gateway via RS485 or via the LAN (RTU485 or LAN).
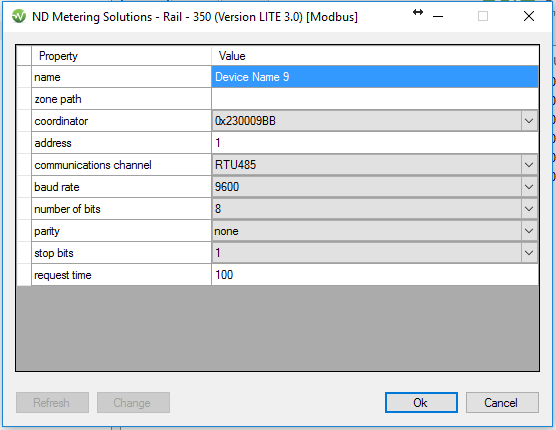
The device name must be a unique name identifier. Unless a convention has been pre-agreed with us, we ask you to use the following naming convention for choosing your unique name identifiers:
OctopusID-counter nameofdevice
(for example use 230007E7-1 Plantroom for the Plantroom meter if this is the first device configured via the Octopus Gateway ID 230007E7 and if Plantroom is the name you want to see in the dashboard for that meter. The next device will use the -2 counter extension etc)
Make sure to insert a space between OctopusID-counter and nameofdevice
For RS485 connections, you must set the same serial line settings registered within your
meter and click OK.
IMPORTANT: Set the response time to 500 if using multi-channel meters or daisy chain
configuration, to allow all the Modbus devices to return measurement in time.
For LAN connections, you must enter your Modbus device’s IP address and click OK.
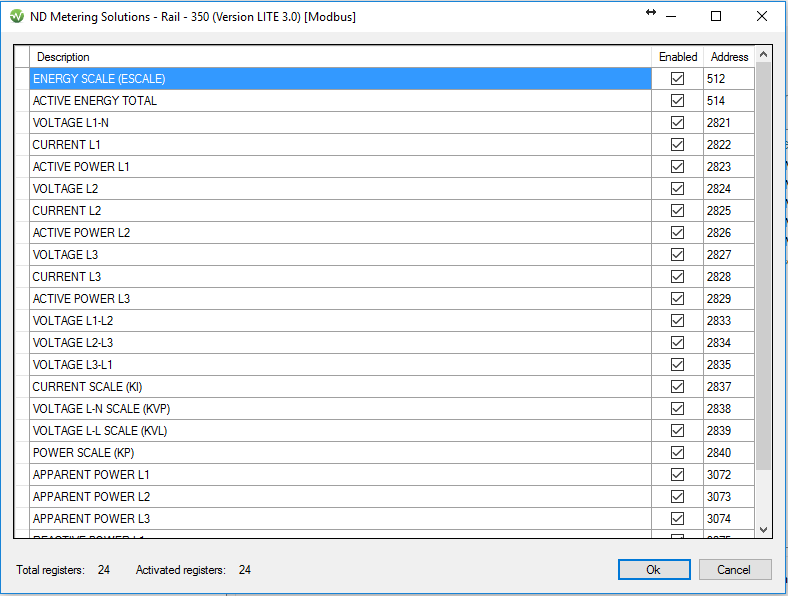
The next screen shows you all the parameters available for that Modbus device. You may unselect some parameters if you are not interested in all measurements. Click OK to save your configuration.
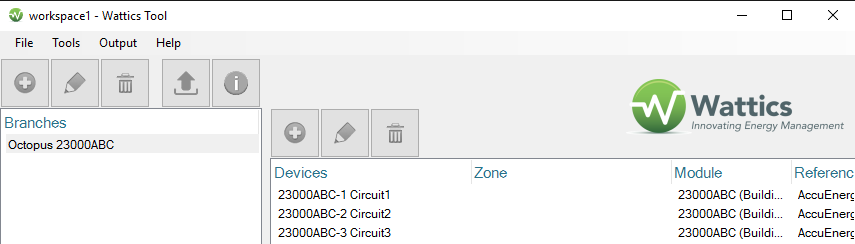
The Modbus device now appears in the list of devices registered within your branch.
You can now add more meters if you have a daisy chain.
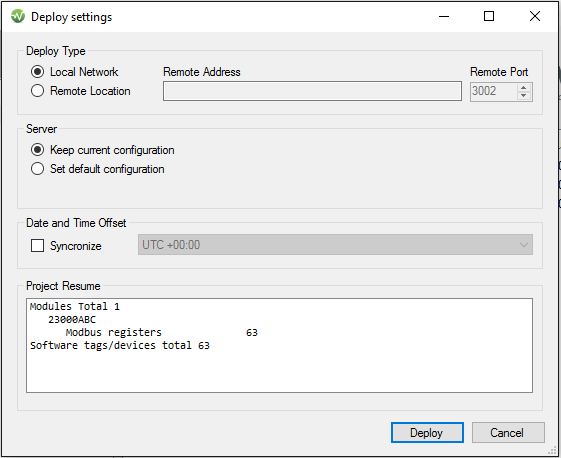
Once you have all your devices created, you must deploy your configuration onto the Octopus Gateway. Select your branch and click on the Deploy button.
On the pop up window, leave the default settings and click on Deploy.
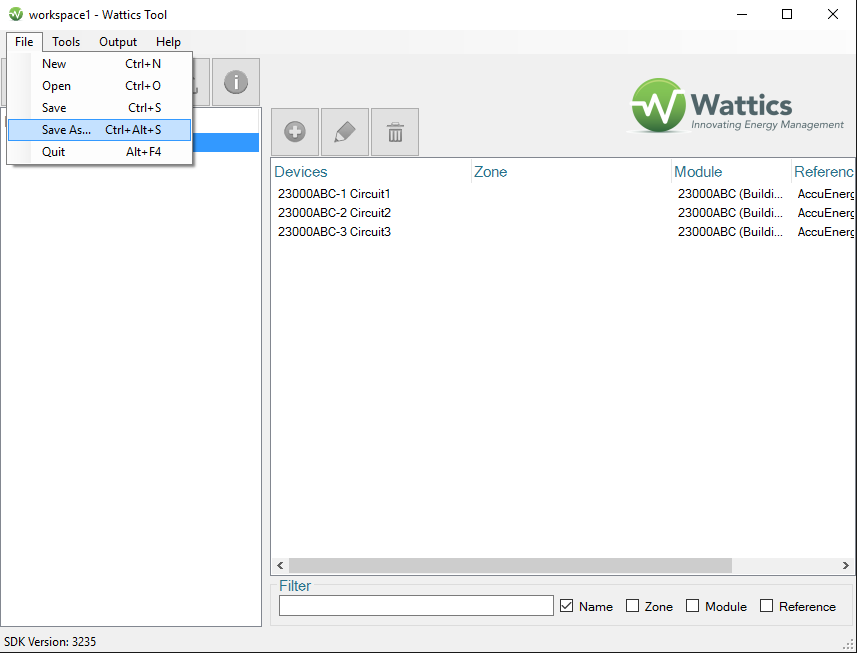
Your Octopus Gateway is now configured for data collection from all the devices connected. We recommend that you save your project should you need to modify the configuration as a later stage. You will then be able to update an existing project when you add new meters.
5 – Check that the Octopus is collecting data from the meter(s)
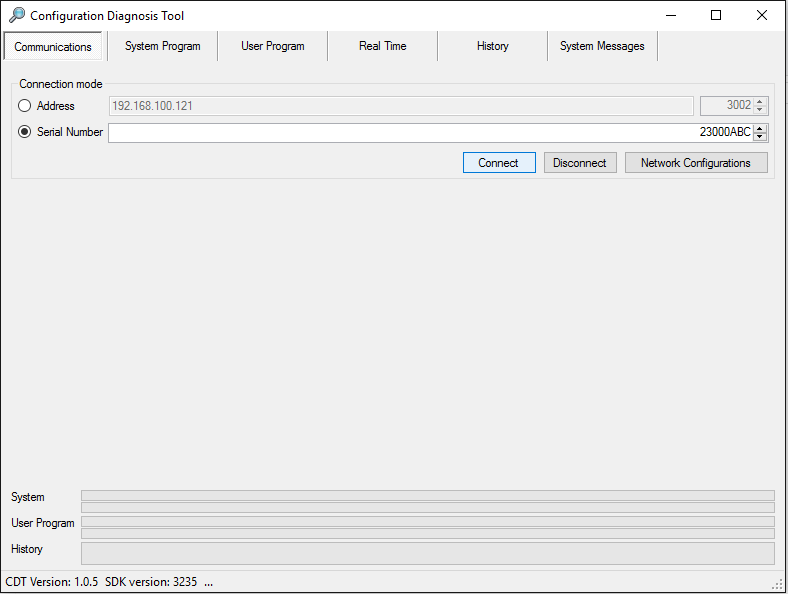
Launch the CDT.exe Software Tool, enter your Octopus serial number and click on Connect.
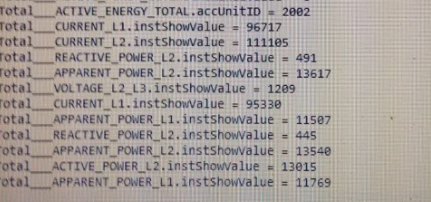
Once connected, click on the Real-Time tab, and verify that you are getting new event logs for the various electrical parameters every few seconds. This confirms that the Octopus is getting the readings from the meter via Modbus. You can then close the CDT tool. Verify your project file settings if you don’t see any data coming in.
5 – Submit your Octopus project to AiElements
Submit your Octopus .iwtx project file to AiElements via:
Octopus .iwtx Project File Submission Form
AiElements will use your project file to double check that the setup is correct and that data is being received from your Octopus Gateway unit and correctly showing in your dashboard. You will then receive access to your AiElements dashboard, and from then on you will be able to log in to your AiElements Dashboard at http://dash.ai-elements.com and get started!
+353 (0)1415 1242 | info@ai-elements.com |
Contact us
Anthony Schoofs
Chief Technical Officer at AiElements
Anthony drives AiElements' innovation on energy efficiency for industrial and grid environments. Anthony is also behind WSNbuzz.com, a blog covering technology advances within the smart grid and IoT markets, and was listed in 2011 amongst the top 100 IoT thinkers. Anthony was recently awarded the Globe Sustainability Research Award for his contribution to advancing knowledge on sustainability.
Latest posts by Anthony Schoofs (see all)
-
Export your AiElements data to Tableau business intelligence software - December 8, 2017
-
Connect your Schneider PowerLogic PM8000 meter to AiElements with the Obvius AcquiSuite EMB A8810 Data Acquisition Server - December 7, 2017
-
Connect your EIG Nexus 1500 meter to AiElements with the Obvius AcquiSuite EMB A8810 Data Acquisition Server - December 7, 2017