


Are you ready for energy savings? Enable our cloud-based energy analytics and dashboard for
your Elvaco CMe3100 Gateway, to
discover, measure and verify savings in the premises you manage. The CMe3100 is a ready to use
DIN-mounted M-Bus Gateway for centralizing all information from metering and measurement devices
deployed in the field. The CMe3100 can send meter values to AiElements for advanced analysis using its
FTP push function.
It is assumed that your CMe3100 already collects data from your meter(s). If not, read and understand Elvaco manuals for installing, operating, or maintaining your CMe3100 Gateway. Installation and program procedures must be carried out and inspected by qualified personnel. Qualified personnel are those who, based on their training and experience, are capable of identifying risks and avoiding potential hazards when working with this product.
Step 1: Register your gateway and data points with AiElements
Register your Elvaco CMe3100 Gateway
One of our tech support representatives will register your CMe3100 gateway, will set up your monthly subscription fee, and will give you access to the AiElements dashboard. You will also receive username and password to use when setting up the gateway to send log files to the AiElements FTP server.
Step 2: Configure your CMe3100 Gateway
1. The CMe3100 is configured through its web interface. Connect the included USB cable between
your PC and the gateway’s USB slave port. After approximately 30 seconds, a new removable disk will be
available on the computer.
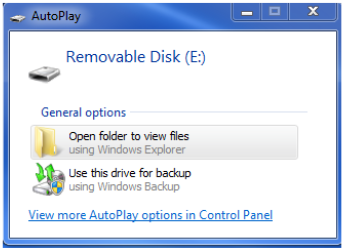
Open the folder on the removable disk. Run the file CMe3100-SETUP.EXE and follow the instructions. When the installation has completed, the web browser will open along with a login page. If the browser fails to do so, please enter the IP address manually. For software versions older than 1.6.0, the IP address 192.168.100.1 is used. For software version 1.6.0 or later, use the IP address 169.254.254.1.
If you are logging in for the first time, use the default credentials below. You will otherwise need to use the credentials created last time you logged in.
-
Username: admin
-
Password: admin
2. When first logging in on the web interface, the Installation panel will be presented. You must set a readout schedule that will determine the time interval by which the gateway will perform readouts of the meters in its meter list. To activate and set the meter readout schedule:
-
Go to Meters > Readout schedule and enable activate Scheduled meter readouts.
-
Set a Meter readout schedule. By for example setting Every 5th minute, a readout of all meters in the Meter List will be performed every 5th minute.
-
Do not activate Continuous readout mode
-
Click Save.

3. Next step is to enable Push reports to be delivered via FTP to AiElements. The first step is to set the default recipient option, to which all activated Push Reports will be sent.
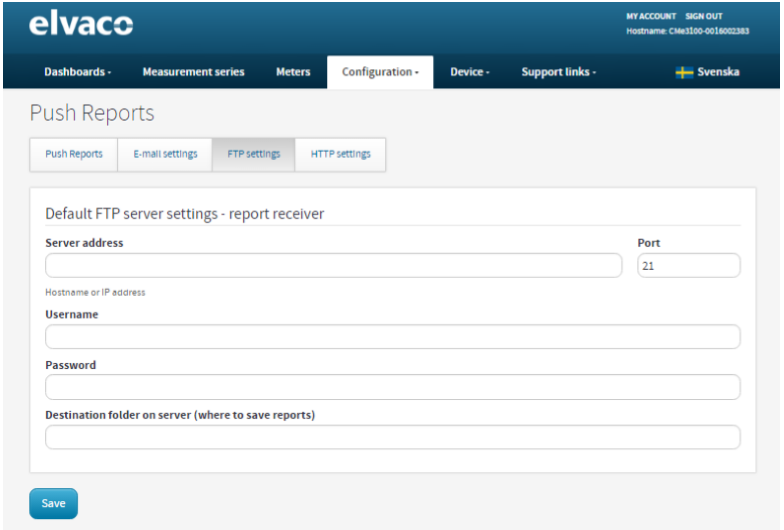
Go to Configuration > Push Reports > FTP settings, and enter the following information:
-
Server address: ftp01.ai-elements.com
-
Port: 21
-
Username: enter username provided by AiElements
-
Password: enter password provided by AiElements
-
Destination folder on server: source
Click the Save button.
4. Now that the Push Report default settings have been made, individual reports can be configured. Go to Configuration > Push Report to see all available reports and their current status.
We are interested in the report template 2101, which denotes FTP reports with all meter values pushed in one file.
-
Go to Configuration > Push Report and click on one of the Scheduled reports currently disabled.
-
Report type: FTP
-
Report template: 2101
-
Report schedule: choose an interval that is greater than your meter readout schedule e.g. 15mn if your gateway collects new readings every 5mn
-
Value Period: Auto, to ensure that all new meter values that have failed to be transmitted will be included in the next successful Push Report
-
Value Interval: All Values, to include all available meter readouts in the Push Reports
-
Report Receiver: tick to send report to default FTP server
-
Click Save & Send test report to upload a test file onto AiElements FTP server. Once successfully tested, you can save and close your FTP Push Report configuration.
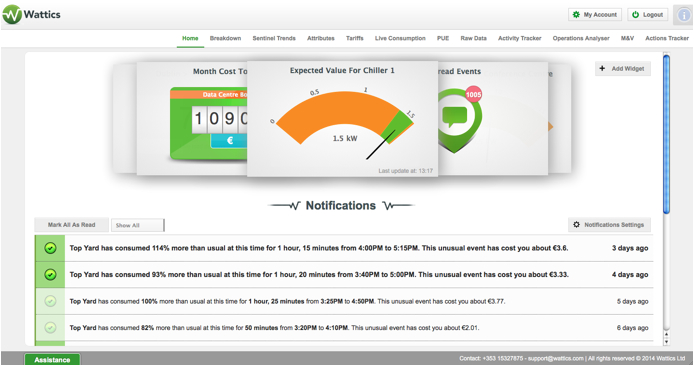
Save your final settings, your energy readings will now be sent to AiElements periodically, log
in to your dashboard and get started!
+353 (0)1415 1242 | info@ai-elements.com |
Contact us
Anthony Schoofs
Chief Technical Officer at AiElements
Anthony drives AiElements' innovation on energy efficiency for industrial and grid environments. Anthony is also behind WSNbuzz.com, a blog covering technology advances within the smart grid and IoT markets, and was listed in 2011 amongst the top 100 IoT thinkers. Anthony was recently awarded the Globe Sustainability Research Award for his contribution to advancing knowledge on sustainability.
Latest posts by Anthony Schoofs (see all)
-
Export your AiElements data to Tableau business intelligence software - December 8, 2017
-
Connect your Schneider PowerLogic PM8000 meter to AiElements with the Obvius AcquiSuite EMB A8810 Data Acquisition Server - December 7, 2017
-
Connect your EIG Nexus 1500 meter to AiElements with the Obvius AcquiSuite EMB A8810 Data Acquisition Server - December 7, 2017