

Internet access will typically be needed for each installation to allow measurements taken from meters and sensors to be pushed online to AiElements. In sites where the existing IT infrastructure cannot be reused for logistics or security reasons, the deployment of a GPRS/3G Router is necessary to provide an independent Internet point dedicated to energy monitoring.
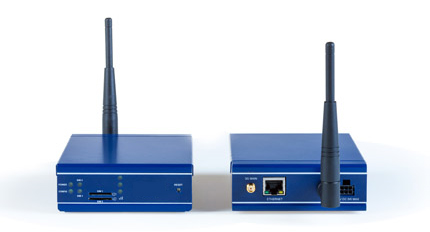
The AiElements WattROUTER is a DIN-rail mounted GPRS/3G industrial router suitable for a variety of industrial deployments. The WattROUTER requires a sim card that you must source from one of the local providers (e.g. O2, 3, Vodafone in Ireland). You need a broadband data contract with at least 5Go data per month for real-time data.
With the sim card in your hands, the WattROUTER must be configured to enable Internet access. This procedure must be conducted only once. After that, the WattROUTER will automatically connect to the Internet when powered up, and will provide a live Internet point to your metering equipment.
Follow the steps below to configure your WattROUTER with your broadband sim card:
1 – Insert the broadband sim card
1. Ensure the 3G router is powered off
2. Hold the SIM card with the chip side facing down and
the cut corner top left
3. Gently push the SIM card into SIM slot 1 until it clicks in
4. To
remove the SIM card, gently push the SIM card. The card will click out.
2 – Connect the antenna
Screw the antenna into the back MAIN SMA connector. You may use the provided magnetic antenna to receive a better signal in basement or remote locations.
3 – Connect the power supply
1. Connect the WattROUTER to an electrical socket using the power adapter provided, or power the
WattROUTER directly from a suitable DC12V/1A DIN Rail DC power supply.
2. The router initialises.
The Power LED lights green, the CONFIG LED flashes, and all the LEDs temporarily light in sequence.
Then the router activates after a few minutes.
4 – Connect the cat5 cable
Connect the 3G router to your laptop for sim card configuration.
5 – Configure the 3G router for Internet access
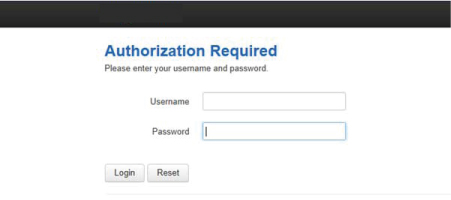
When the router has booted up, browse to 192.168.100.1 in your web browser, enter the username and password below and click login:
-
Username: root
-
Password: admin
If the WattROUTER is operating in its factory configuration mode, a warning message appears explaining that after you have made changes, you will need to switch the WattROUTER to config1 for the changes to take effect. This step is explained further later on.
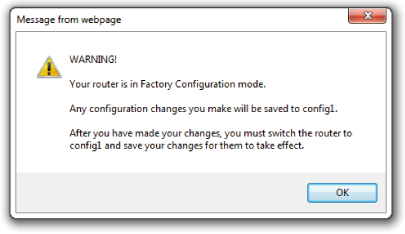
Read the message and click OK.
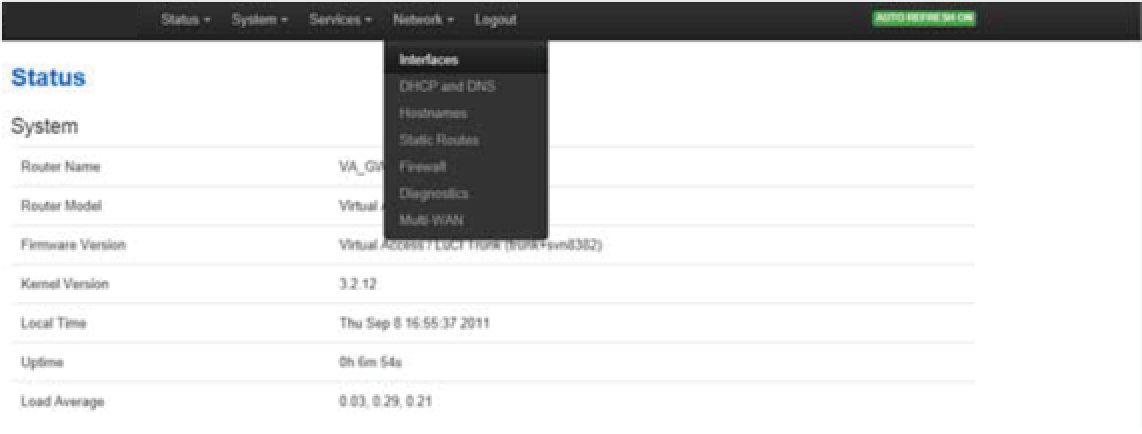
To configure the 3G connection, go to the top menu, select Network -> Interfaces.
Click Edit on WAN to make your changes. The Common Configuration page appears.

1. Ensure you have selected the General Setup tab.
2. For single SIM implementation, in the SIM
drop down menu, select SIM 1.
3. Enter the correct APN information and PAP/CHAP username and
password for your sim card. A PIN may be required for the sim card, but you can leave this field empty
if unknown. The document below should be used to find the correct APN credentials for your sim
provider if you don’t know it yet.
Find your APN credentials
4. Click Save & Apply.
Next step is to configure the WattROUTER to reboot when Internet connectivity fails. To add a scheduled script to ping a remote destination IP and reboot the router on a failure, proceed through the following steps:
-
Browse to the WattROUTER and login
-
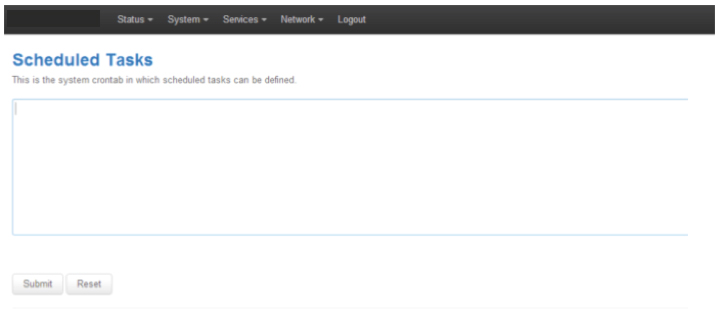
Select the System Tab and select Scheduled Tasks
-
A screen opens as below:
-
Paste in the following: */5 * * * * ping -W 3 -w 20 8.8.8.8 || reboot
-
The ping will be executed every 5 minutes and will run for 20 seconds
-
Submit
Finally, if you have seen the warming message saying that the meter is in Factory Configuration Mode, you will now need to switch the WattROUTER’s factory configuration file to the new configuration (otherwise you can directly reboot the WattROUTER). For that go to System -> Backup/Flash Firmware in the top menu.
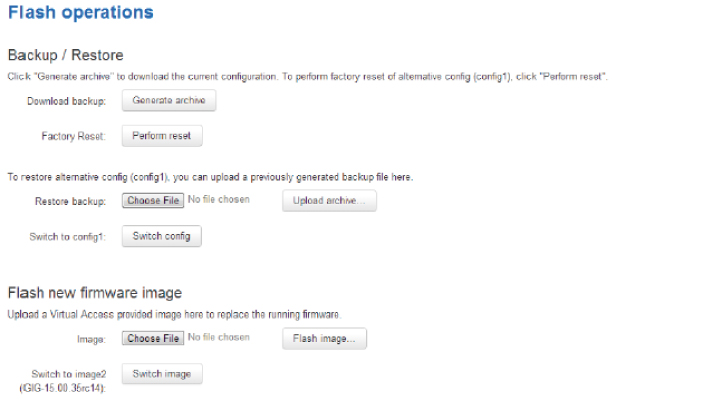
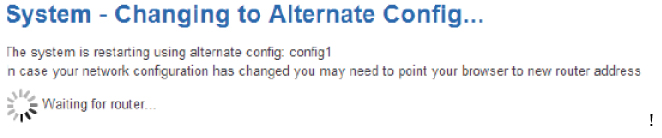
In the Flash Operations Backup/Restore section, where the text says “Switch to config1” click on “Switch config” to make the new configuration the default one. A rebooting message appears to let you know that the WattROUTER will reboot into the new configuration and this may take 2 to 3 minutes.
6. After reboot, to check for Internet connectivity, return to the top menu, and select Network ->
Interfaces. The WAN interface will show receive and transmit packets and an IP address.
7. To view
3G connectivity information, select Status -> Mobile Stats. The Mobile/3G information page appears.
You may run a final test to check that the WattROUTER is providing a suitable Internet Access point using your laptop:
-
Remove the cat5 cable from the AiElements Gateway Unit
-
Connect the cat5 cable to your laptop (make sure you have DHCP enabled, which is the default settings on most laptops)
-
Open your web browser (Internet Explorer/Firefox/Chrome)
-
Try to access ai-elements.com. If you can then you know that your WattROUTER is working as expected.
You can remove the cat5 cable between the laptop and the WattROUTER, and from now on you have an Internet Access point via the WattROUTER and you will not need to repeat that configuration process again unless you change your sim card provider.
Troubleshooting
Follow the steps below to verify that your AiElements WattROUTER is configured correctly:
-
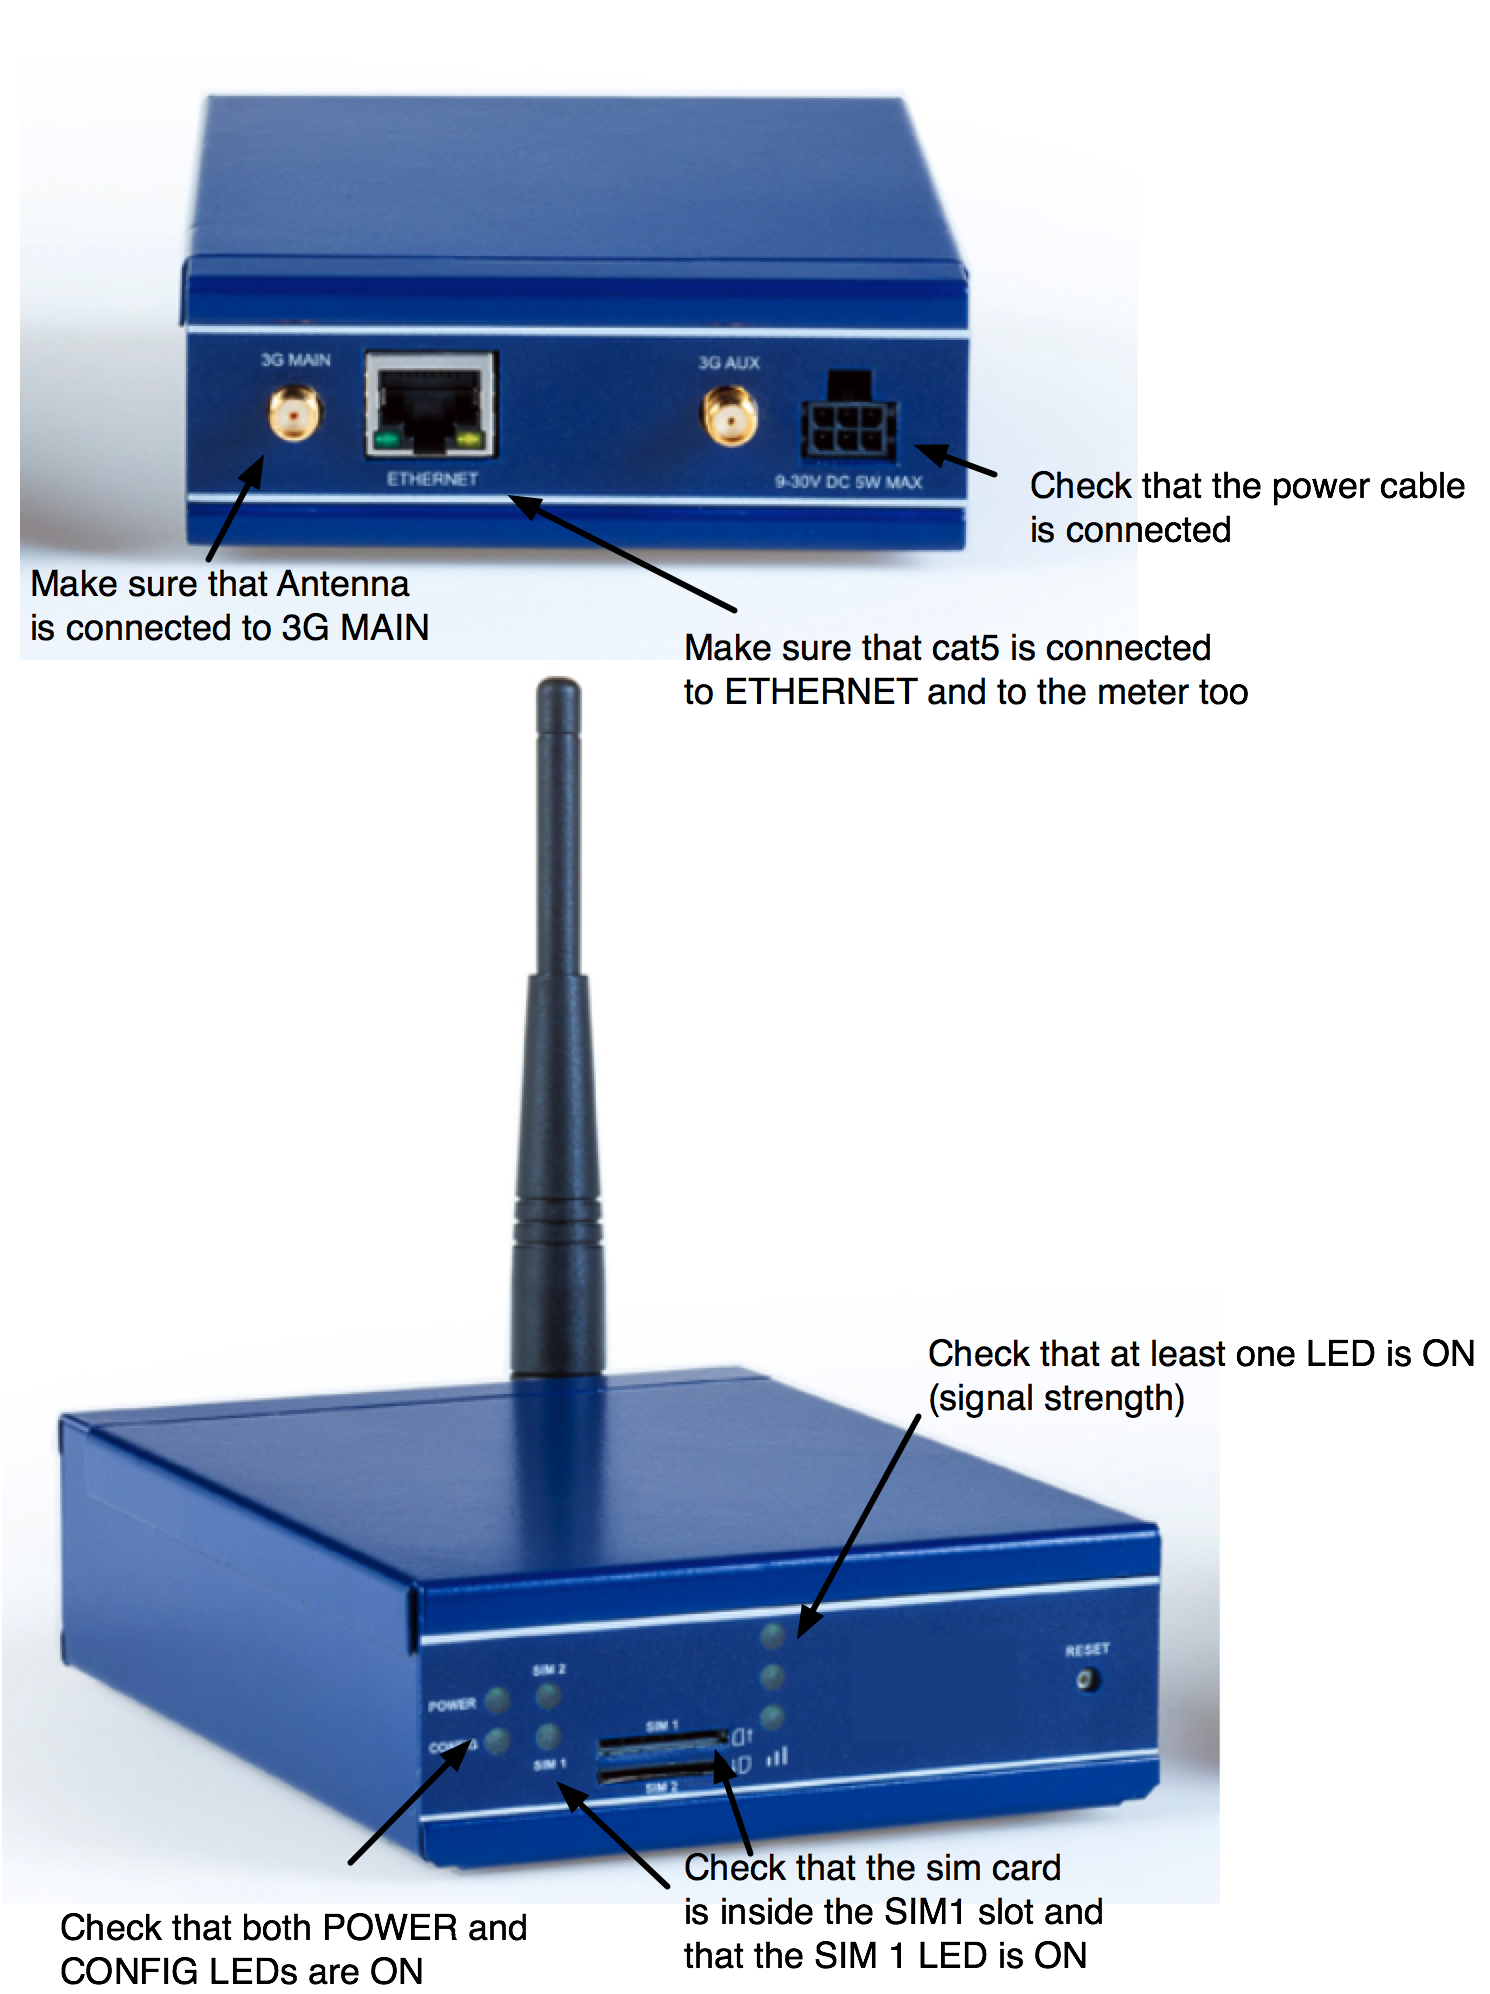
The power supply cable must be connected to the WattROUTER and power source
-
An antenna must be connected to the 3G MAIN antenna slot
-
Both the POWER and CONFIG LEDs must be on
-
The sim card has not been removed from the SIM1 slot and the SIM 1 LED is on
-
At least one signal strength LED is ON (3 LEDs on indicates maximum signal strength)
Signal strength can also be improved with a better antenna location. Try moving the antenna around closer to wall openings to get a more reliable signal (at least two LEDs on). For deployments in areas where GSM signal is extremely poor, we can supply indoor and outdoor high-gain antennas with long leads, please contact us at support@ai-elements.com to discuss your requirements.
Additional checks should be done if you have difficulties in enabling your Internet Access point. You must analyse LED behaviour to understand Internet connectivity status as indicated below.
The WattROUTER has single colour LEDs for Power, Config, SIM1, SIM2 and signal strength. When the router is powered on, the LED is green.
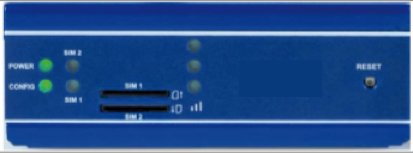
Example of power and config LED activity: power and config are on
The possible LED states are:
-
Off
-
Flashing slowing
-
Flashing quickly
-
On
The following table describes the possible LED behaviour and meaning.
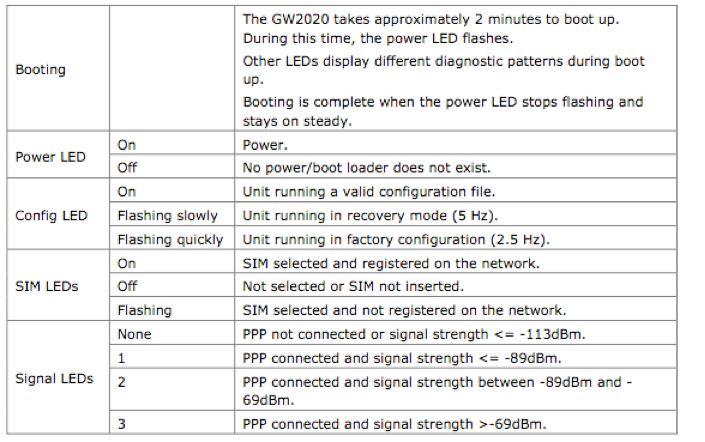
LED behaviour and descriptions
Check how many Signal LEDs are On when the WattROUTER is operational. Poor signal strength may result in frequent disconnections, and a high gain antenna may be needed in environments when GSM signal has low reachability.
The Ethernet port has two LEDs: a LINK LED (green) and an ACT LED (amber). When looking at the port, the LED on the left hand side is the LINK LED, and the ACT LED is on the right hand side.
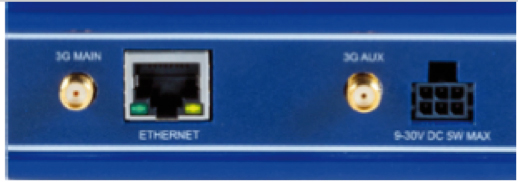
Ethernet LED activity
Check that the Green LED is On and the Amber LED is flashing when the WattROUTER is operational.

At all times you can also contact our support team at support@ai-elements.com or +353 (0)1415 1242.
Anthony Schoofs
Chief Technical Officer at AiElements
Anthony drives AiElements' innovation on energy efficiency for industrial and grid environments. Anthony is also behind WSNbuzz.com, a blog covering technology advances within the smart grid and IoT markets, and was listed in 2011 amongst the top 100 IoT thinkers. Anthony was recently awarded the Globe Sustainability Research Award for his contribution to advancing knowledge on sustainability.
Latest posts by Anthony Schoofs (see all)
-
Export your AiElements data to Tableau business intelligence software - December 8, 2017
-
Connect your Schneider PowerLogic PM8000 meter to AiElements with the Obvius AcquiSuite EMB A8810 Data Acquisition Server - December 7, 2017
-
Connect your EIG Nexus 1500 meter to AiElements with the Obvius AcquiSuite EMB A8810 Data Acquisition Server - December 7, 2017