

This post illustrates how to enable the automated transmission of meter readings from your eGauge meters to the AiElements Energy Analytics Dashboard in five easy steps. Please also review our online video tutorial providing the same instructions.
eGauge meters allow for automated data transmission via HTTP Post, meaning that once the meter is given internet access it can be configured to send data to AiElements without the need of additional hardware requirements such as a gateway device. The set up to configure the meter to automatically push data to AiElements is extremely easy and can be carried out in a few minutes following this step-by-step guide.
STEP 1: Set up the AiElements platform for integration of your eGauge meter
You will need a AiElements user account to proceed with the integration. Please get in touch with us to get started.
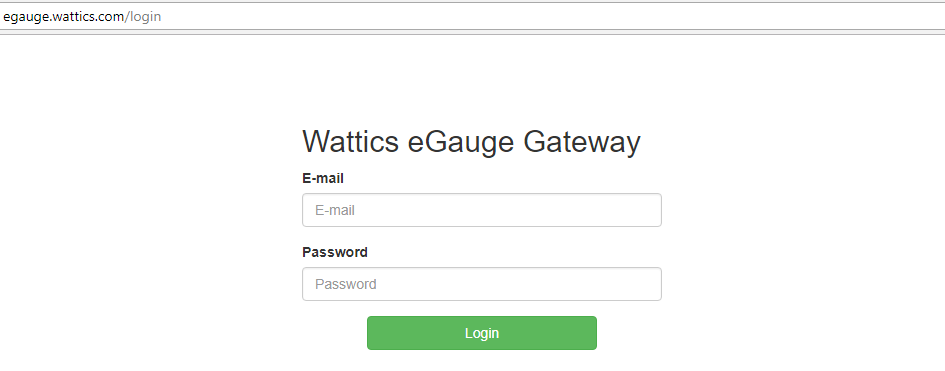
Log in to the AiElements eGauge configuration page at http://egauge.ai-elements.com, using your AiElements credentials.
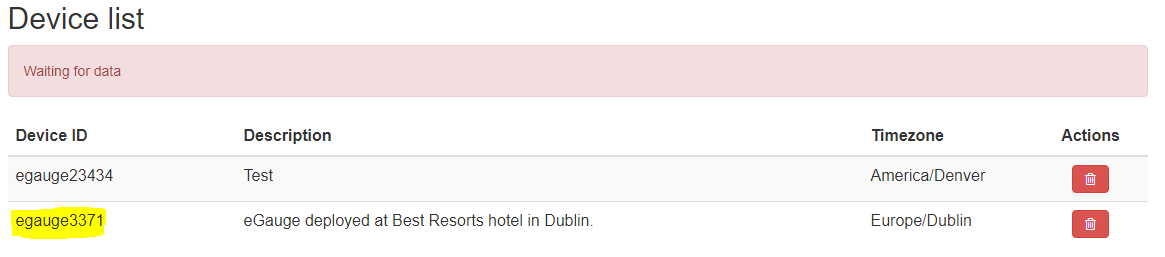
Once logged in, you are presented with an overview of all the eGauge devices associated with your AiElements account:
-
Waiting for data: devices not yet configured to push data to AiElements.
-
Ready for mapping: devices for which data is received but for which is not yet mapped to data points in the AiElements dashboard.
-
Operational: devices pushing data shown in the AiElements dashboard.
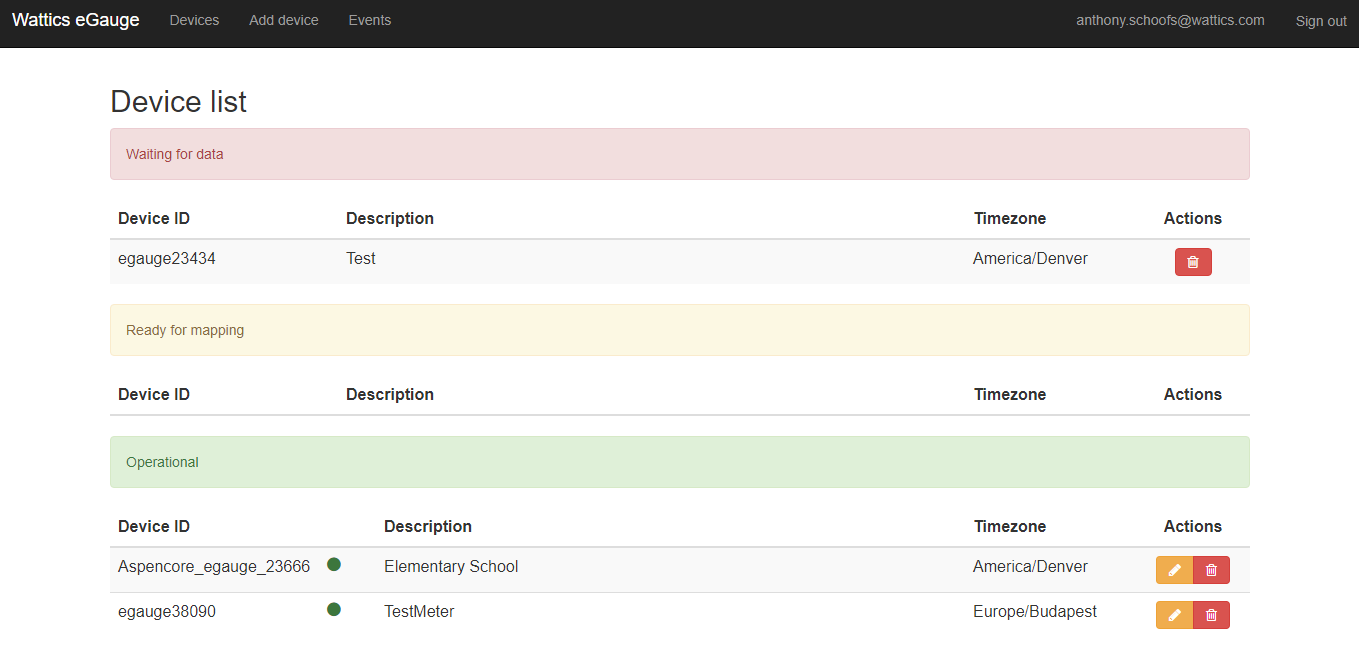
You must now add your eGauge device by clicking the “Add device” in the top menu.

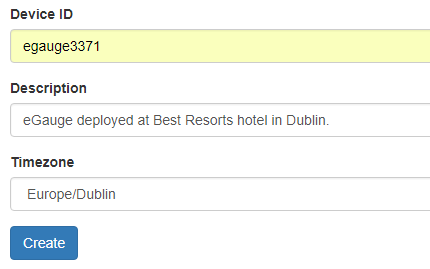
In that page you must register your eGauge device, by entering:
-
Device ID: a unique identifier for your eGauge, e.g. eGauge3371
-
Description: anything relevant for you to remember which device this is.
-
Timezone: the timezone in which the device is located.
Once created, your new eGauge device will be shown in the Devices list as waiting for data, and you can now move to configure your eGauge meter to push data to AiElements.
STEP 2: Connect your eGauge meter to the Internet
NOTE: Your eGauge’s DEVICE-NAME is the device name printed on the front of your meter.
If your eGauge meter is already connected to the Internet (LED blinking on and off) and can be accessed through http://DEVICE-NAME.d.egauge.net/, move directly to Step 2.
If your eGauge meter is not yet connected to the Internet, plug your eGauge meter to the local LAN using a cat5 cable. Your eGauge meter will automatically setup Internet access by obtaining its local IP address and associated network information through a service called Dynamic Host Configuration Protocol (DHCP). You should see the LED blinking on and off a few moments after the meter is plugged in to the LAN. Your eGauge meter is now online and can be accessed through http://DEVICE-NAME.d.egauge.net/, where DEVICE-NAME is the specific name of your meter. You can now move to Step 2.
See http://egauge.net/support/#documentation for advanced static IP address configuration and troubleshooting.
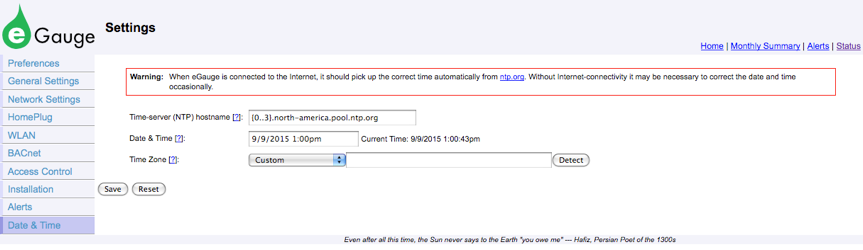
STEP 2: Set the correct time zone for your meter
Access the eGauge configuration interface via the meter’s local IP address or through http://DEVICE-NAME.d.egauge.net/, replacing DEVICE-NAME with the name of your meter. Click on ‘Settings’ in the top right menu.
Click on ‘Date & Time’ in the left menu and make the necessary changes to ensure that the Current Time shown is your local time.
STEP 3: Configure data upload to AiElements
Click on ‘General Settings’ in the left menu and select ‘custom’ for the ‘Data Sharing’ parameter.

Set up your meter to automatically send data to AiElements cloud platform as follows:
-
Enter https://egauge.ai-elements.com/api/xml?devid=Device ID in the URI field, replacing Device ID with the identifier you have set for your eGayge device in step 1, e.g. eGauge3374.
-
Set Interval to 1 minute
Click on ‘Save’ to complete the configuration. Use your username and password if prompted. After saving the page, your eGauge device will start pushing data logs to the URI above, which will be capctured by AiElements.
STEP 4: Map your eGauge data with data points in your AiElements dashboard
eGauge meters can physically connect up to 12 x CTs to measure a portfolio of electrical parameters over four 3-phase circuits or 12 monophase circuits. Furthermore, eGauge data registers can be configured to monitor specific parameters unique to each installation. You must click on ‘Installation’ in the left menu of the eGauge configuration interface to visualise and configure your data registers.

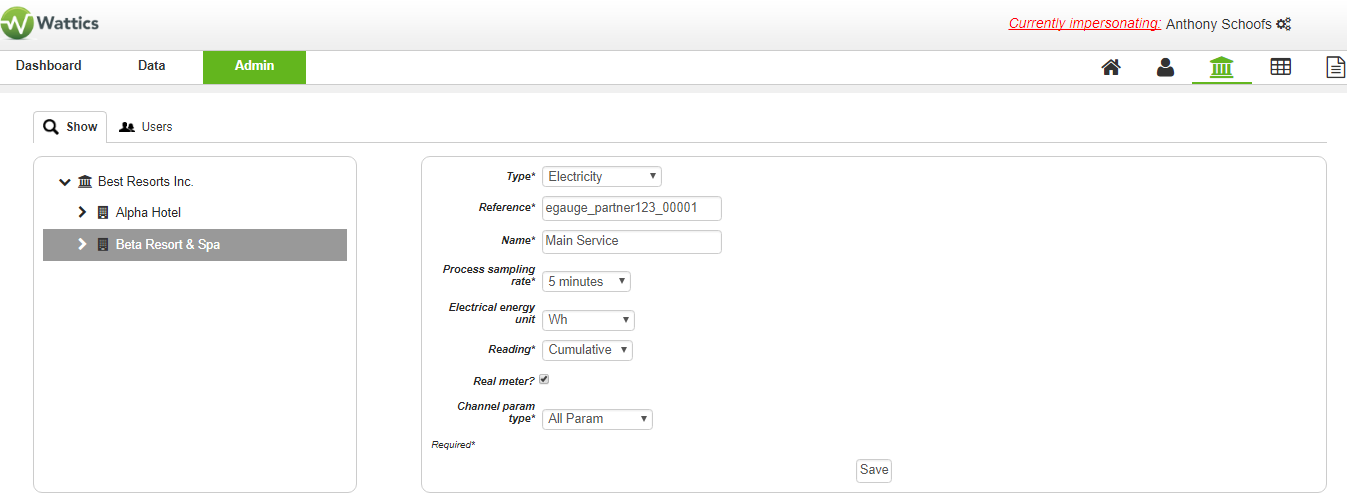
You must now create data points in your AiElements dashboard to use the data received from the eGauge device, and link the eGauge data registers to them through the AiElements eGauge configuration page. Log in to your AiElements dahsboard and find your organisation in the Admin tab. There, create a new data point at the right location within your menu tree, specifying the attributes below:
-
Type: Electricity
-
Reference: A globally unique data point identifier
-
Name: The name of your data point in your dashboard
-
Process sampling rate: 5mn
-
Electrical energy unit: Wh
-
Reading: Cumulative
-
Real meter: Ticked
-
Channel param type: All parameters
Now that your data points is created, you can return to the AiElements eGauge Configuration interface, select your eGauge device ready for mapping, and click “Add a channel” to start the mapping.
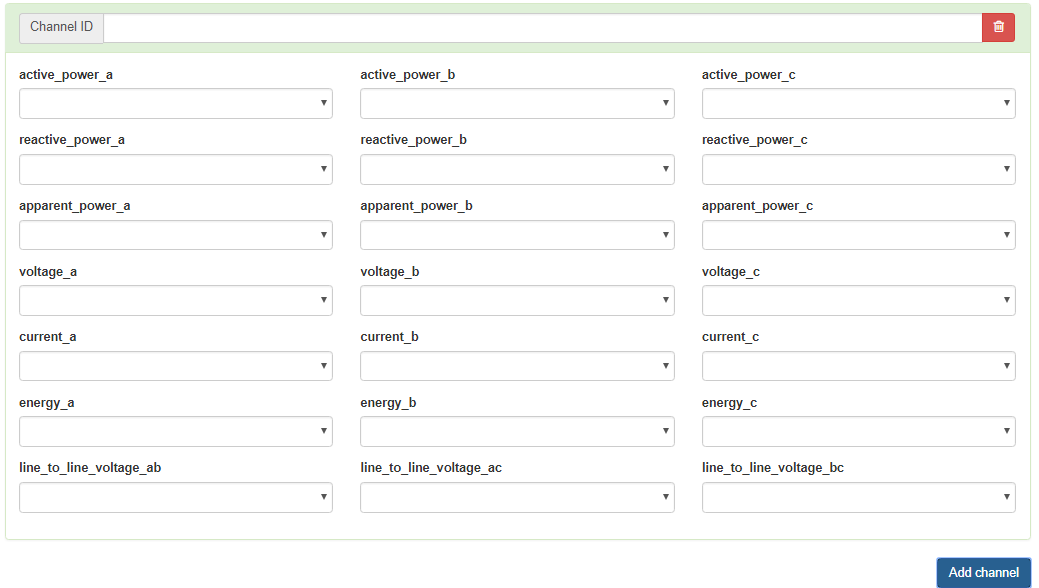
This opens a form that will allow you to enter the global unique Channel ID (the reference you have set for your new data point), and for each electrical parameter of that data point select which eGauge data register corresponds. For instance, an eGauge data register called Volts L2 will contain values for your AiElements Data point voltage_b attribute.
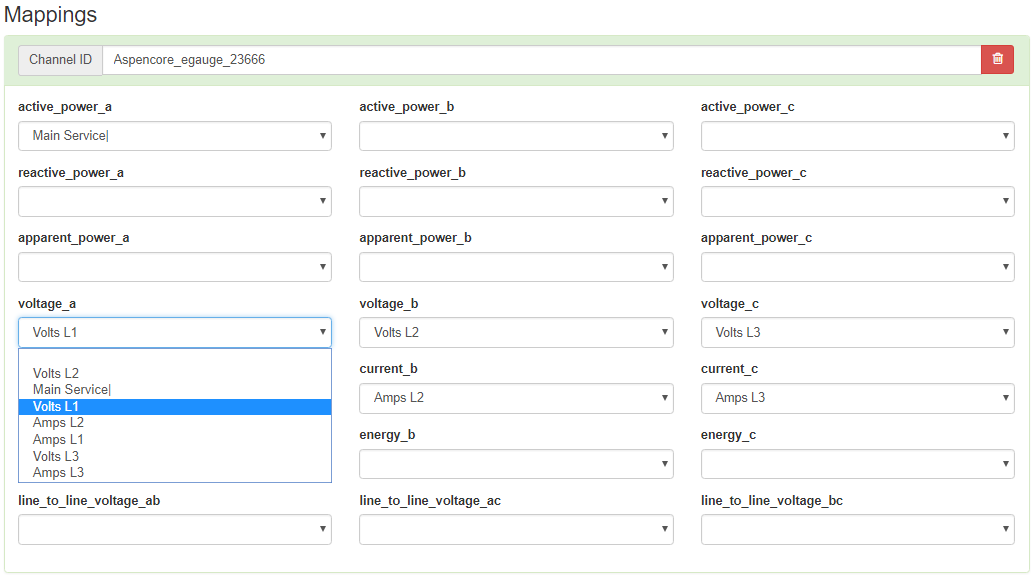
When your eGauge device monitors more than one circuit, you must create multiple data points in the AiElements dashboard, and create multiple channels in the AiElements eGauge Configuration interface to map your eGauge data registers to attributes of various data points.
When your mapping is finished, your device goes to the Operational status, and your data starts flowing to the Wattis dashboard.
STEP 6: Get started with AiElements!
You can now log in your AiElements dahsboard and verify that data is being uploaded as expected.
Please contact us at support@ai-elements.com if you have any difficulty with configuring your system.
Anthony Schoofs
Chief Technical Officer at AiElements
Anthony drives AiElements' innovation on energy efficiency for industrial and grid environments. Anthony is also behind WSNbuzz.com, a blog covering technology advances within the smart grid and IoT markets, and was listed in 2011 amongst the top 100 IoT thinkers. Anthony was recently awarded the Globe Sustainability Research Award for his contribution to advancing knowledge on sustainability.
Latest posts by Anthony Schoofs (see all)
-
Export your AiElements data to Tableau business intelligence software - December 8, 2017
-
Connect your Schneider PowerLogic PM8000 meter to AiElements with the Obvius AcquiSuite EMB A8810 Data Acquisition Server - December 7, 2017
-
Connect your EIG Nexus 1500 meter to AiElements with the Obvius AcquiSuite EMB A8810 Data Acquisition Server - December 7, 2017